MAKING OF "CLOSE UP PORTRAITS"
TEXTURING
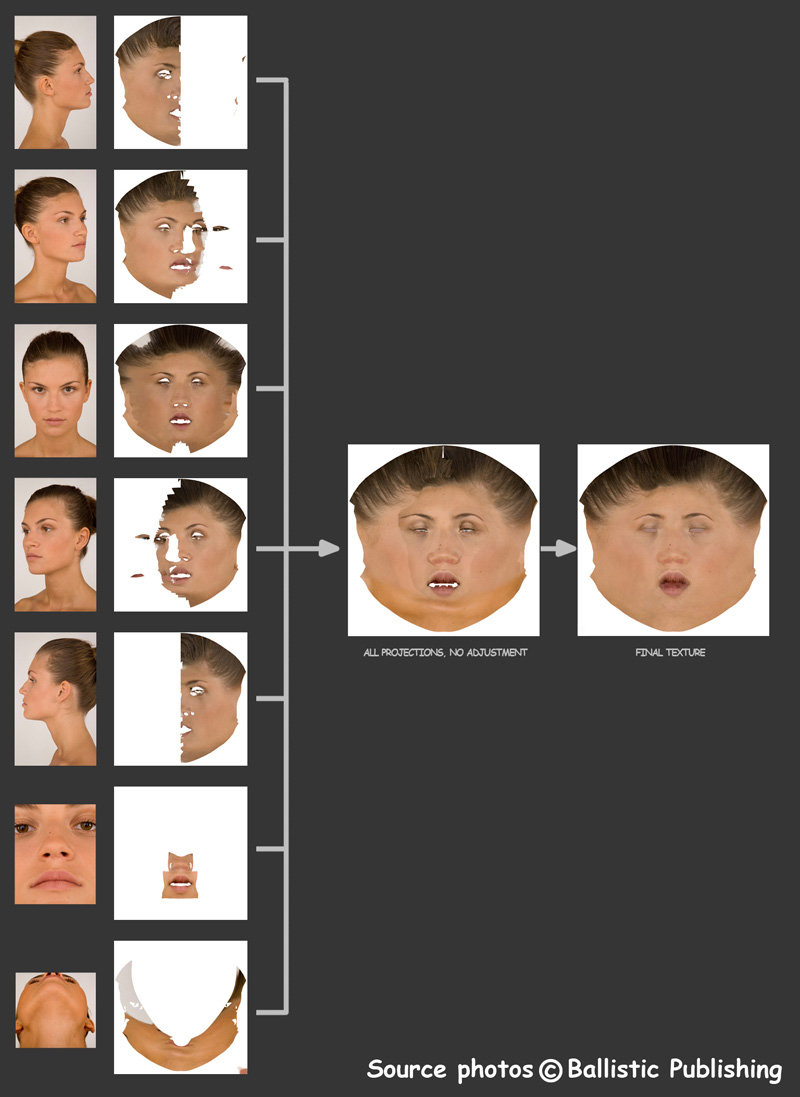
Once I had finished the Uvs I started creating the texture. I used photographs from the DVD “Essence the face” as the source for the textures of the skin. It comes with hi-res photos of a woman:

I created the texture between Bodypaint and Photoshop. I made several proyections of the photos on the geometry and then merge all together in the final texture.
With more detail:
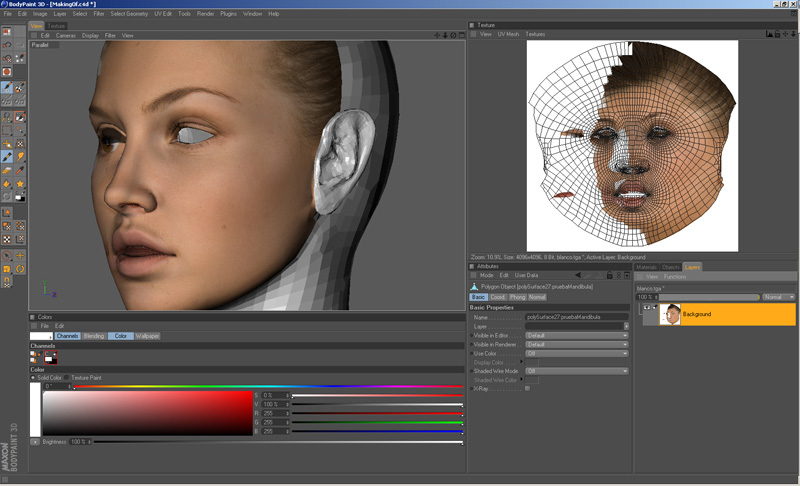
In Bodypaint, first assign a white 4096px texture to the geometry.
Then I chose a photo to proyect on the geometry and then rotate the 3Dview in a similar way.
Now, projection painting. This creates a proyection layer.
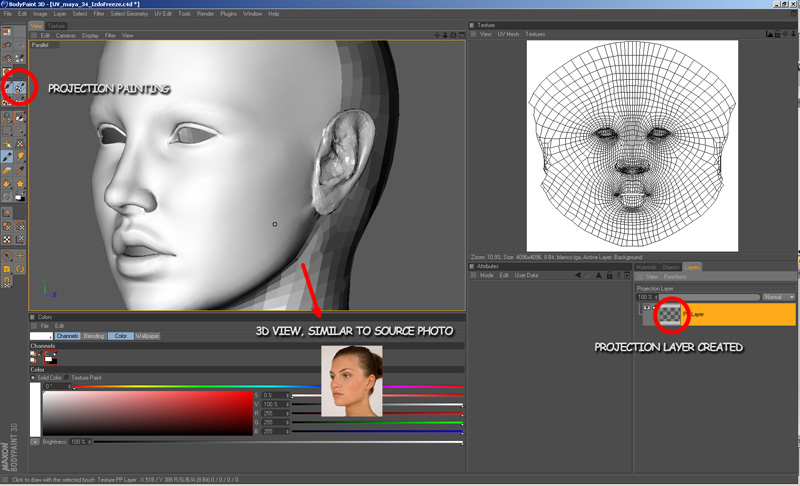
Then “Freeze3Dview”. This creates a snapshop of the current 3D view placed in the proyection layer. (I chose 4096 pixel resolution,. With that I didn´t loose resolution when reproyected).
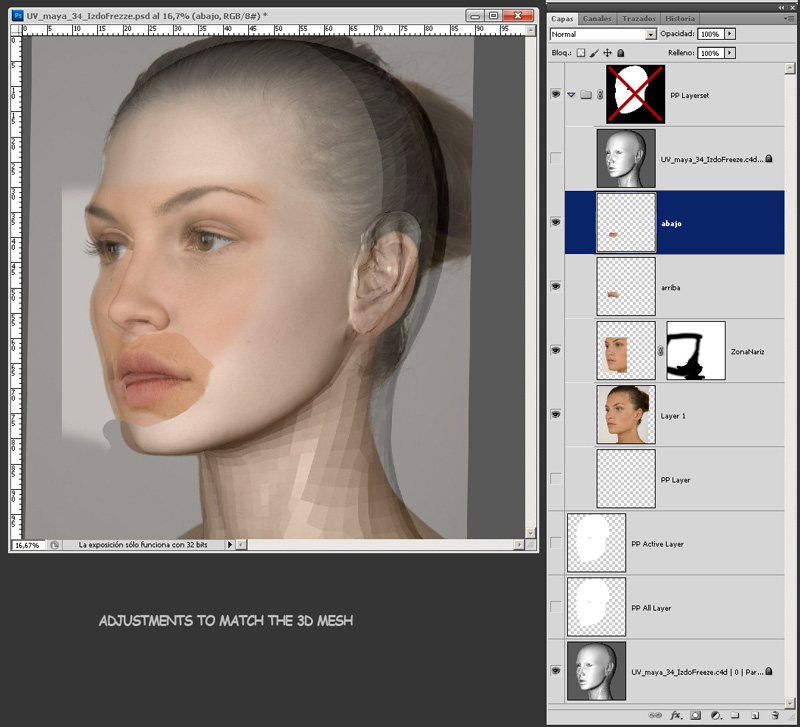
Save this image as a psd file. In photoshop I modified the original photo to match the geometry in the areas. Made different layers to have more control in specific areas:
When ready, the final psd has to have this layer configuration (the original) in order to be Bodypaint compatible:
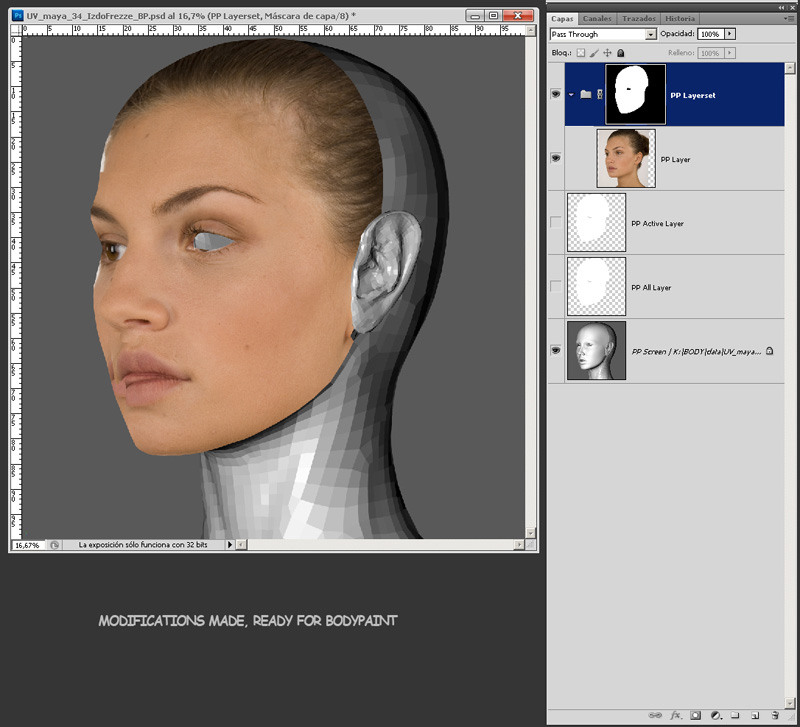
Back in bodypaint, merge the texture with the new one and disable “Freeze3Dview”.
This bakes the projection in the texture and then save that texture.
As you can see, this projection is good only for a part of the face. I repeated this process several times to cover all the face with projections. I made 5 (2 laterals, 2 quarters and front) and some extra to add details in lips and nose.
When I did all the projections, I merged all in a psd, chose the best pixels for each one and matched the colors between all to dont´see any differences between them: