MAKING OF "POKER MASTER"
DETAILING & TEXTURING
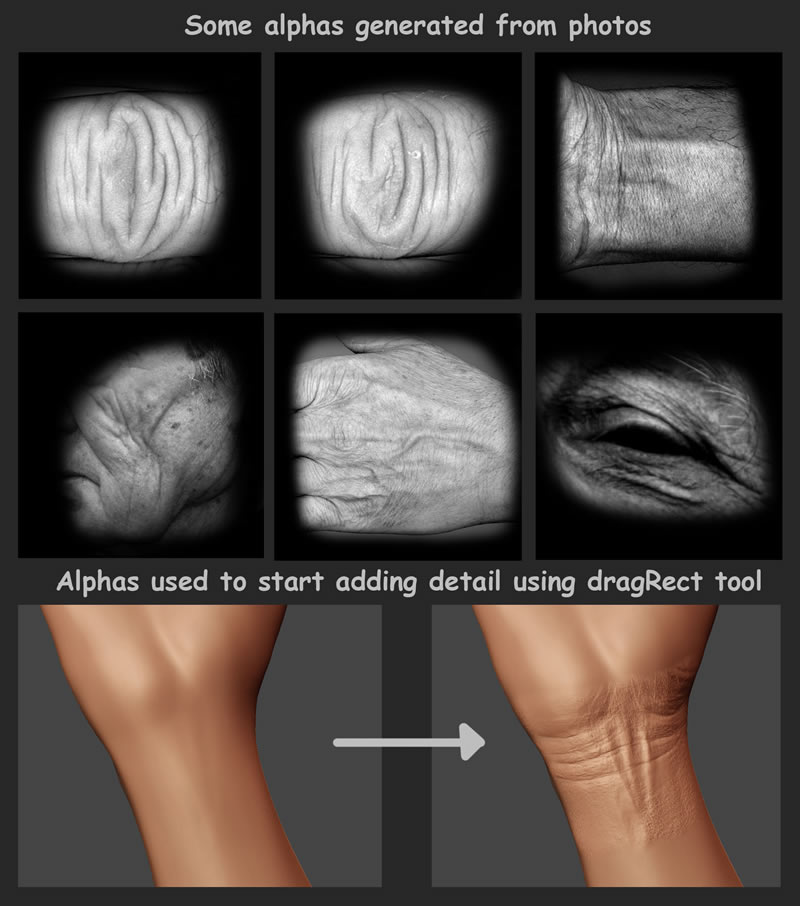
Once I had the OBJs with the correct UVs, I imported back to ZBrush and started to add detail and subdivide. At this point, it was a process between ZBrush, Photoshop and BodyPaint. I used different ways to add detail, such as using alphas with the DragRect tool in ZBrush.
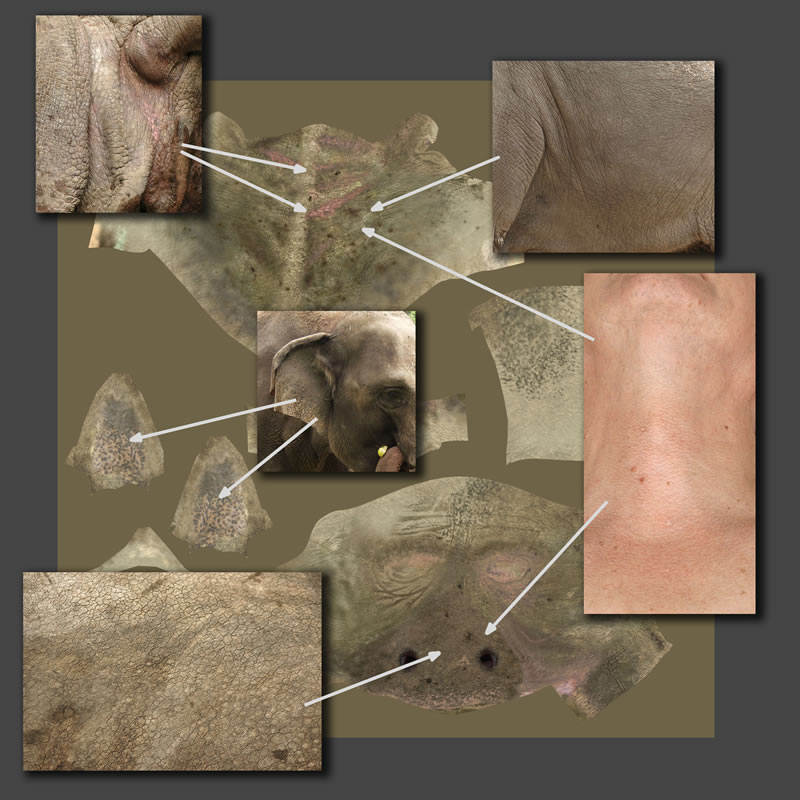
Also, in Photoshop, I added some texture layers from photographs.
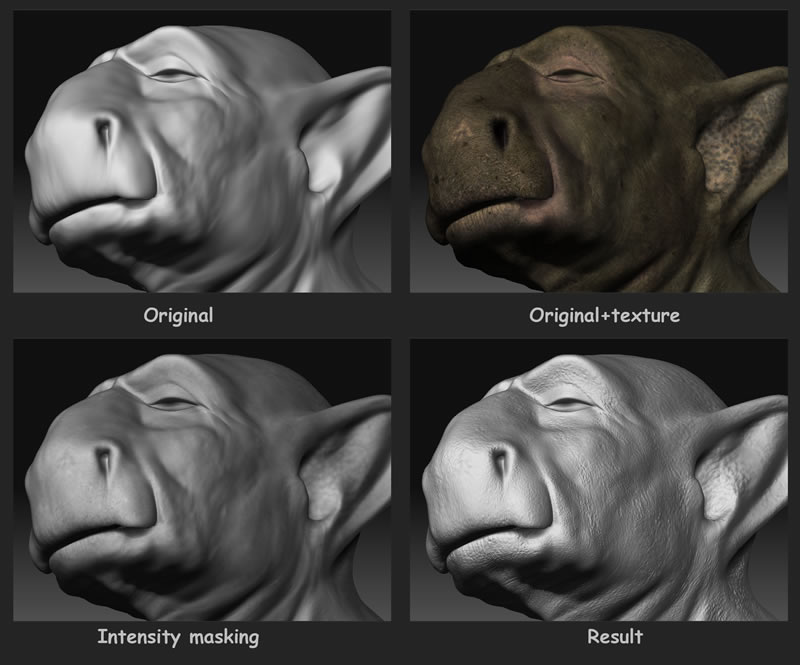
And then in ZBrush I modified the geometry based on that texture, masking by intensity.
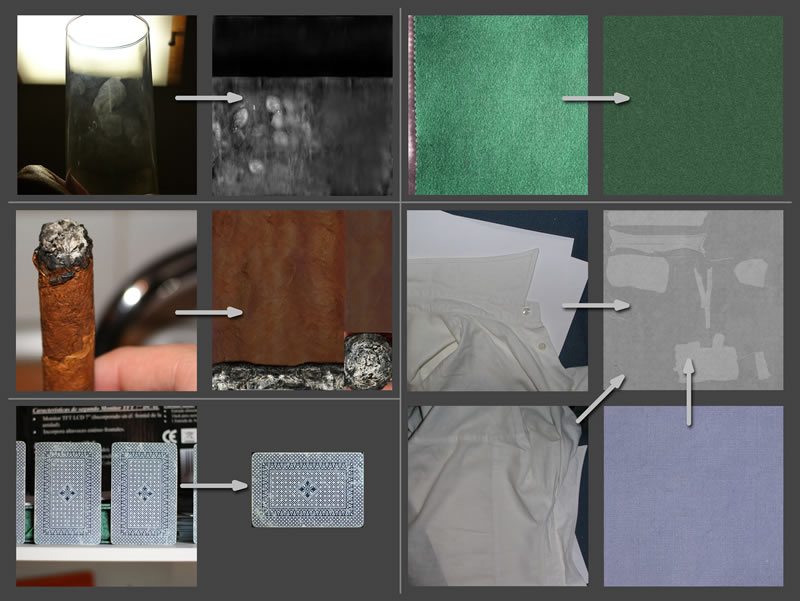
Sometimes I generated first the displacement in ZBrush and then used that information to modify the texture based on that, using cavity maps. In Photoshop I used that cavity map texture for masking.
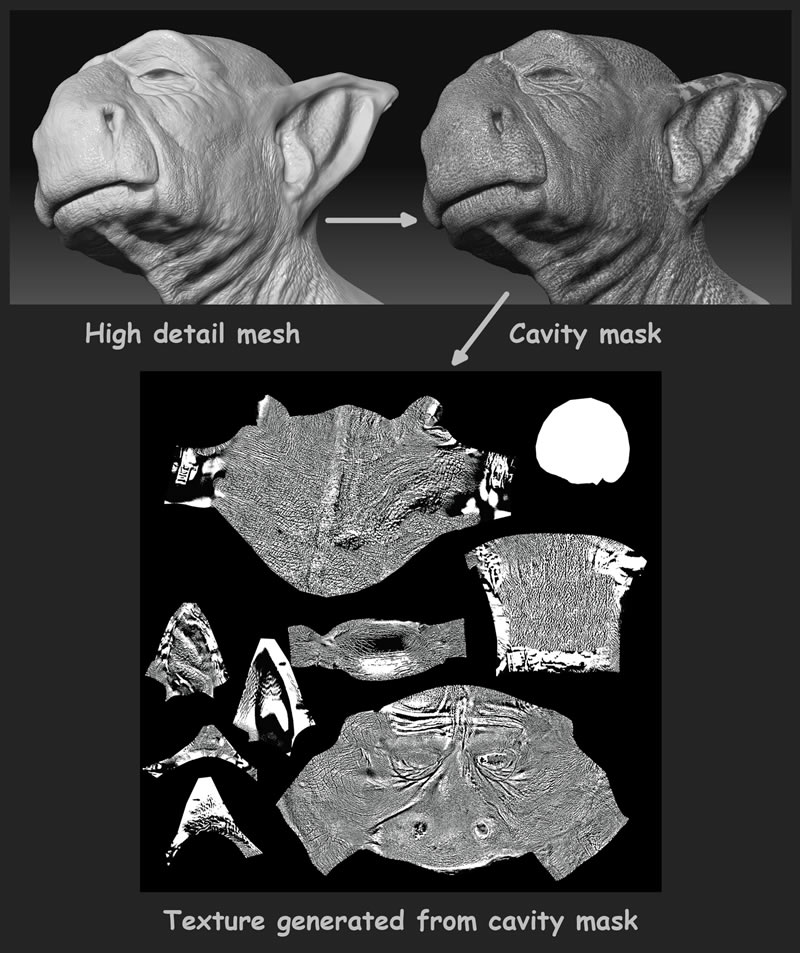
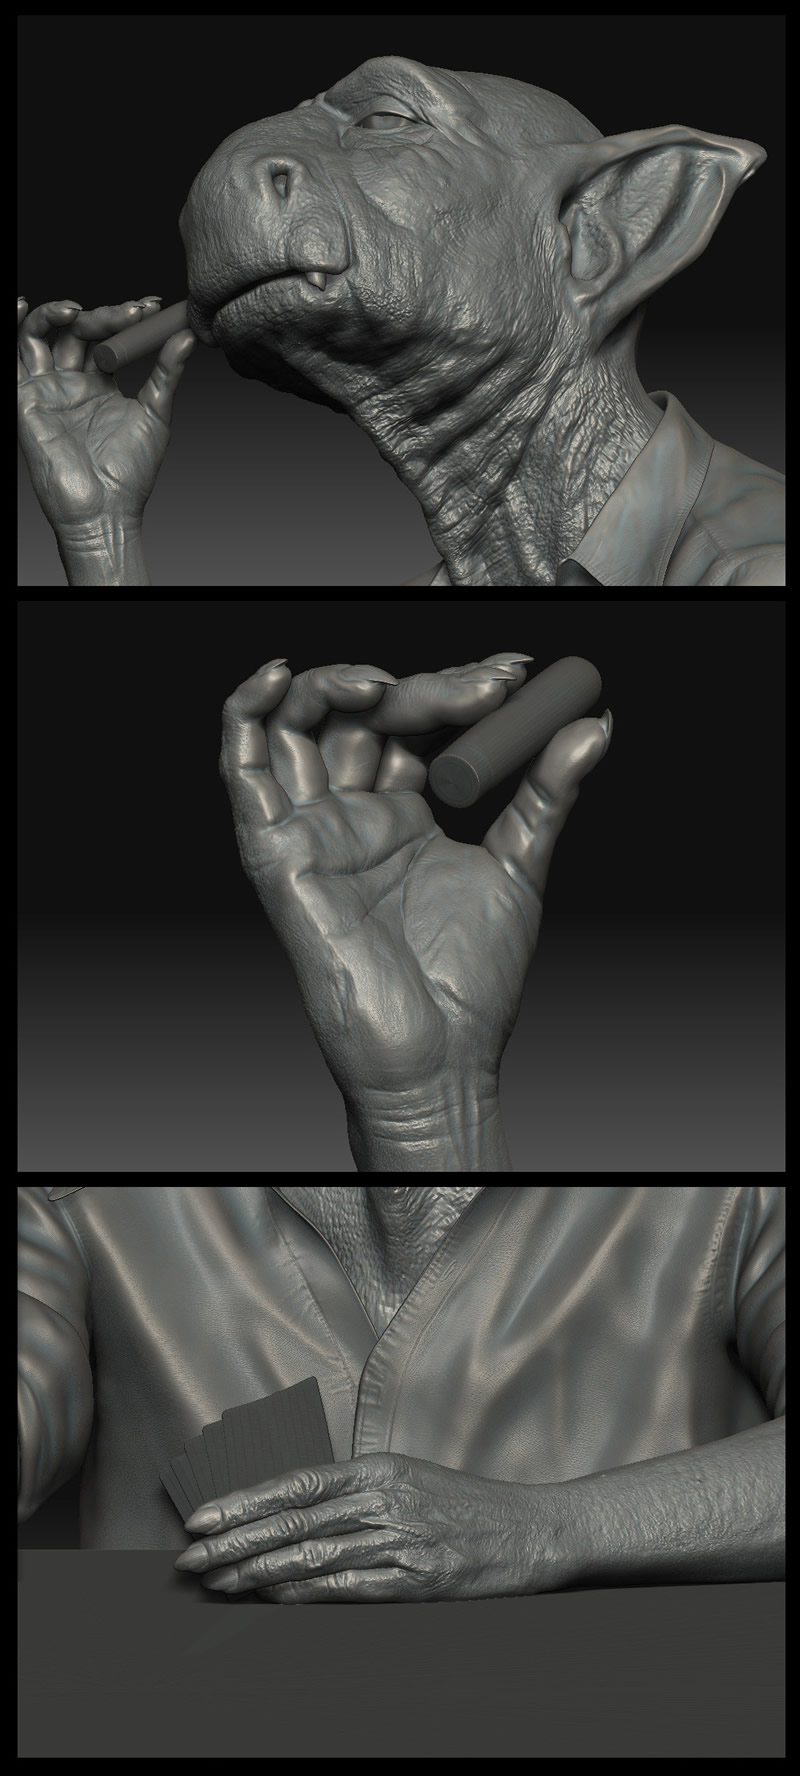
I also used ZBrush’s poly painting feature and BodyPaint to remove the seams, to add detail and project photos. Finally, I created a normal map to apply to the shader in Maya. This is the final aspect of the geometry in ZBrush.
For the shirt and the rest of elements, I took photographs of all the possible things that I could use.