MAKING OF "POKER MASTER"
LIGHTNING
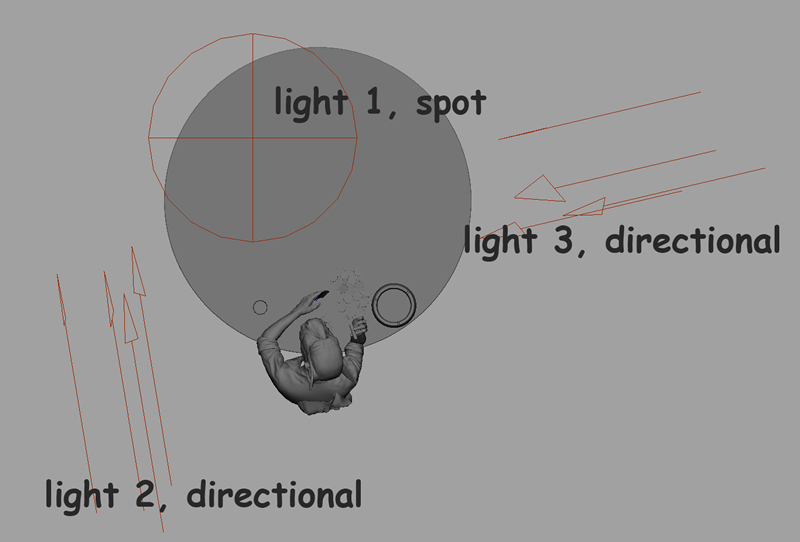
Back in Maya, I assigned a neutral white shader to start with the lighting tests. I used 3 lights, as follows:
- One light above his head acting as main light (light 1)
- One bluish backlight (light 2) that accentuates the volume of the head
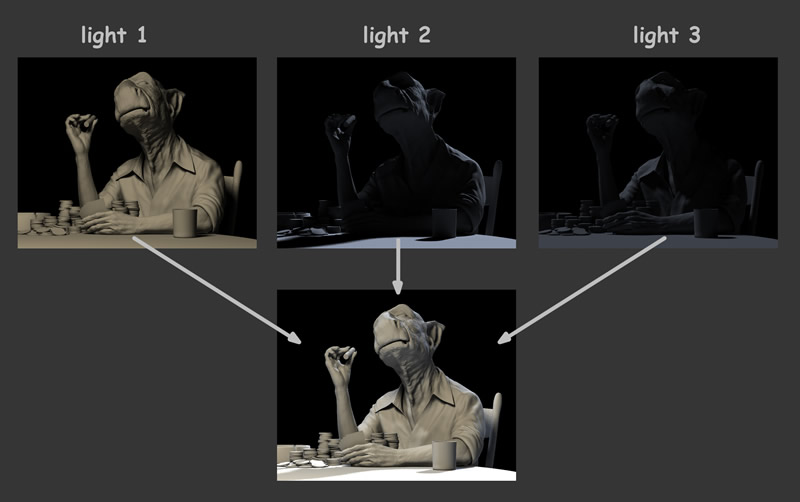
- One bluish fill light coming from the left of the image (light 3) to reduce the dark areas of the character
You can see the effects of this lightning setup in this image:
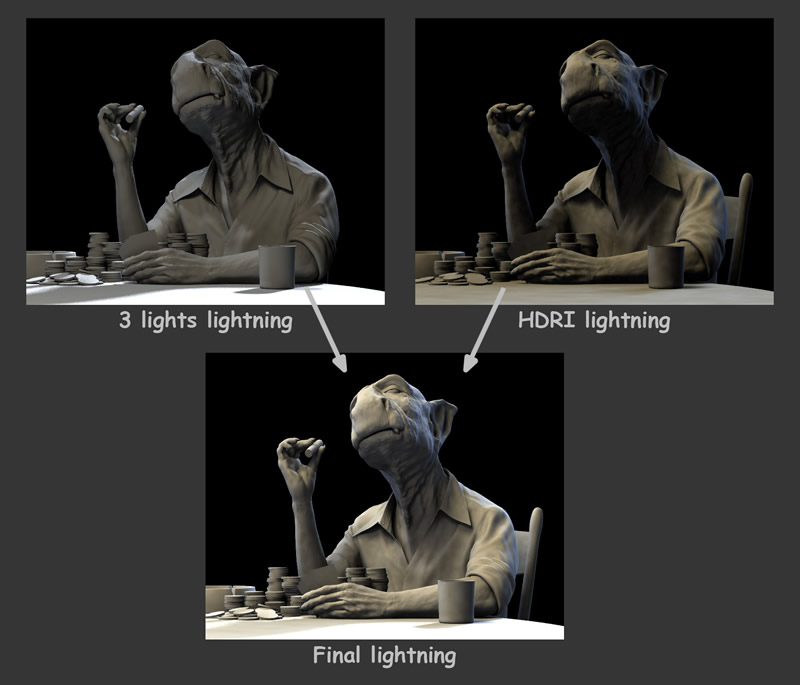
At this point, I decided to add an HDR sphere to make the lighting with more variations. In Photoshop, I merged different HDRs and placed the light sources of those HDRs to match the lighting that I previously created in Maya. I also duplicated some light sources from the HDR and changed the hue and intensit. I then mapped the HDR to an invisible sphere.

As this FG lighting would be added to the previously created lighting, I reduced the intensity of the initial Maya lights in order to finally get a similar light intensity with the FG sphere just adde.
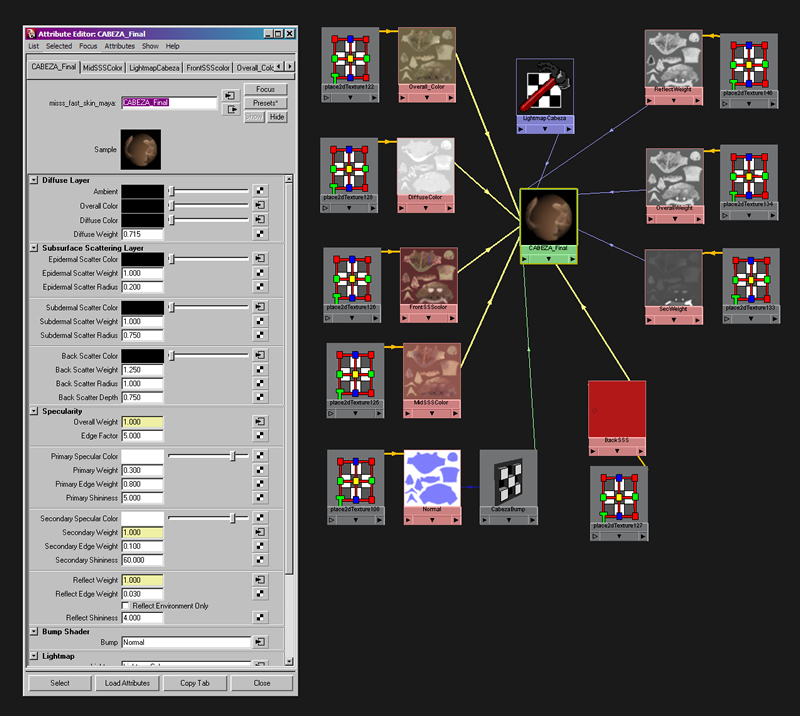
SHADING
In this section of the article I’m going to focus on the head and the arms; the other objects simply used “standard” shaders.
For the head and the arms, I used the Mental Ray shader, “misss fast skin”. First, with the colour base assigned, I adjusted the colours and the weight/radius values. Finally, instead of using a solid colour for all those colour boxes, I duplicated the base texture and made some adjustments in Photoshop to match the colour that I had previously chosen. This added more variety to the shader.
The base colour texture was 4096 by 4096 pixels. The other textures were 2048 by 2048 pixels, to reduce texture memory.